navbar

Image Map

Wednesday, January 29, 2014

Faux Wood Grain Wall


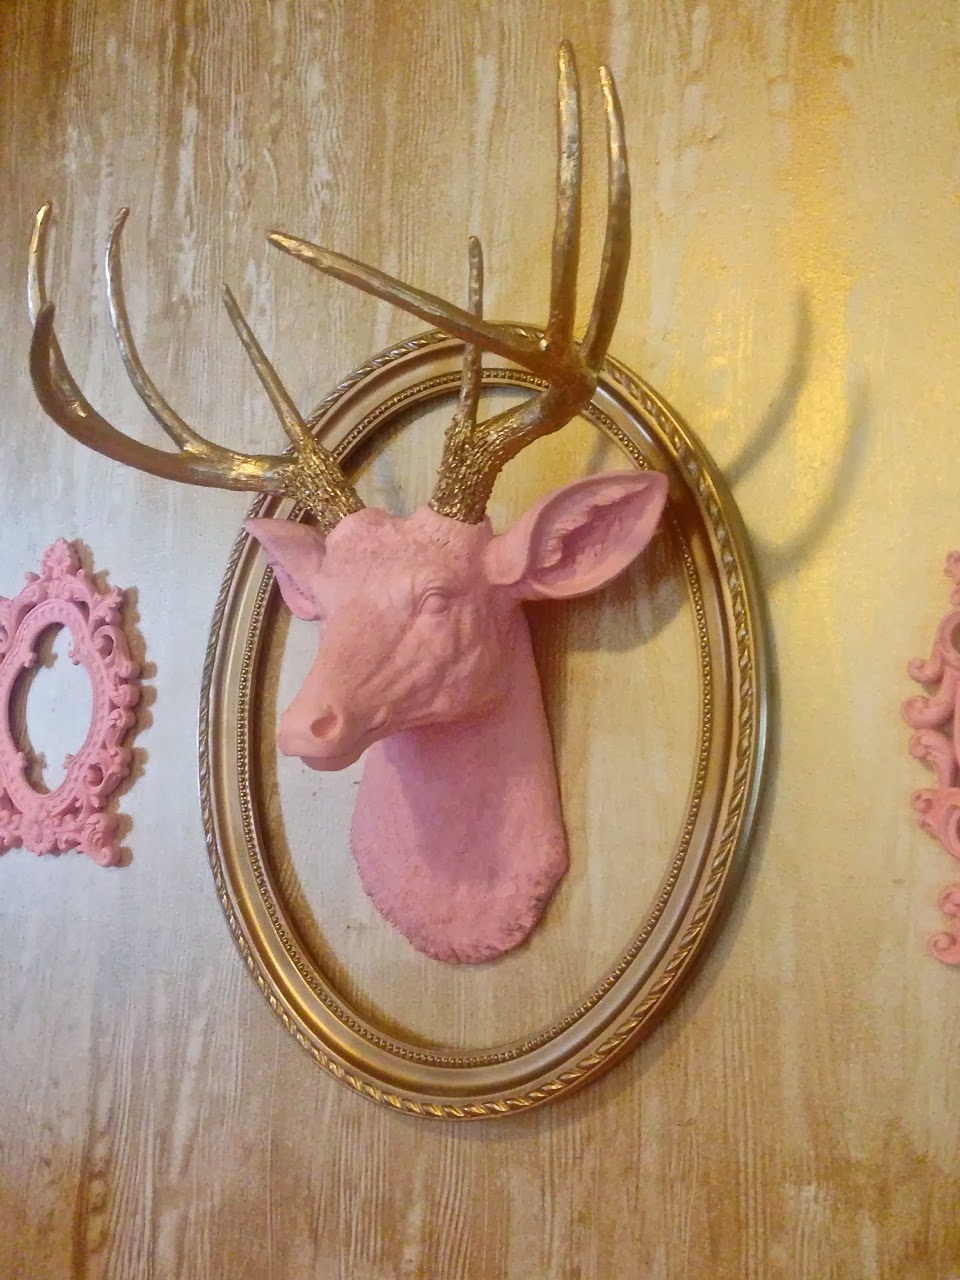
I have seen photos online of the faux wood grain and have always been a fan, but it seemed like something that would be a huge pain in the butt. Over the holiday's we went over to a friend's house and the whole wall behind her bed was painted with this wood grain and she explained how easy it is. So I took my butt to Home Depot and picked up the Martha Stewart faux wood grain roller and the Martha Stewart Metallic Glaze in "Medallion". My husband and I went back and forth as to whether or not we needed to add anything to this glaze before using it. In our case, we did not. If you choose regular paint you should look into that.

You will need:

*your wall/project already painted with base coat of choice
*wood grain tool
*Martha Stewart glaze
*rolling pin/pan


You can also check this link out.

1. To start, pour your glaze into the paint pan. (We ended up using two containers of the glaze for one wall.)
2. With a paint roller, roll the glaze onto the wall.
3. Quickly use your wood grain tool, you will figure out what method you like best. Start by just dragging it vertically and start with the top part and end with the bottom. You want to drag it in an uninterrupted motion. You will want to change your drag each time though to get the desired wood grain effect.
If you do no tike the way it looks (and you probably won't the first few times), you can simply drag the tool over it again, OR reglaze that piece and try again.
4. Repeat steps 2 and 3 over and over until the wall is finished.

It is easier to do with two people, as my friend suggested so you can have one person roll a row of the glaze, and then the other person use the faux wood grain tool and repeat.


Tuesday, January 28, 2014

The Best Protein Balls


 These are my absolute favorite version of protein balls! I have made a few different kinds of the past year or so, and my favorite recipe is the one I found on gimmesomeoven.com. They are quick, easy, delicious and everyone in my house eats them!
 The ingredients may seem a little pricey but they go a long way. I can make many batches from the ingredients, so that's a plus!

You need:
*1 cup old fashion oats
*1/2 cup of flaked coconut
*1/2 cup of peanut butter/or almond butter
*1/2 cup flaxseed or wheat germ
*1 Tbsp chia seeds (optional)
*1/3 cup honey or agave syrup
*2 tsp vanilla extract
*1/2 cup chocolate chips
*1/2 cup dried fruit (optional)

*Mix all of the ingredients together well and then put in the refrigerator for about 30 minutes.
*Roll into balls and enjoy!!!

*If the recipe seems to wet, add more oats. If it seems too dry add a lil more honey ;)

Sunday, January 26, 2014

Bumble and Bumble Dryspun Finish


 I love this so much I had to blog it. I have tonsssss of hair products that I never use. The only products I religiously use on my hair are hair spray and dry shampoo. Every once in a while I will throw in one of the unnecessary products just because I have them. (And there are some i really like, but for everyday I just don't always have time for that). Last time I was at the salon getting my hair done by my hair goddess/wizard Nina Childers, (owner of Bella Salon and Spa in Chester Springs,Pa), she said I HAD to try this. My hair is certainly on the fine side. I just happen to have a lot of it (thank god it's growing back after I lost my entire front hair line post Priscilla).
 So I used this after I styled and hair sprayed my hair and WOW- it really really does give your hair a soft "bounce" and good texture. Definitely giving this one a thumbs up. 


Friday, January 24, 2014

Ikea Expedit Hack


 Wow. Who knew? We have had this old, beat up Expedit thing forever. Actually, we have had a few. I think we gave our other one to our babysitter a few years ago. Even though we are moving in a few months, I haven't stopped refurbishing,decorating,etc. I mean, it's less I have to do when we move right??
 For the past few weeks I have been redoing the "playroom". I say "playroom" because it is really just an oddly shaped room off of our living room that is supposed to be a dining area…because we have outgrown this house, there is no dining in that room! It is just over packed with toys. So here I am trying to make the best of a small, oddly shaped house with too much stuff! Anyway, the Expedit was about to go OUT THE DOOR but I was like, hmm…let's paint it. And we did. And it's AWESOME. I really wish I would have taken a photo of the before! It was so so so sad. It had smashed shelves, falling off shelves, scuffs, it was a hottt mess. We started out by fixing the shelves and then went from there.


You need:

An expedit shelf
Primer
Paint (I recommend satin. I used eggshell, and I have to put a top coat on because it's too flat)
Small legs (wood section of hardware store)
Straight top plate (to connect the legs)
Plywood
Drill


-If it is the dark/brown ikea color you have, you need to prime it and prime it WELL. I would recommend three coats of primer. I did two (because I'm lazy) and I ended up having to use three coats of actual paint on some spots. Which is obviously way more expensive than just sucking it up and doing a third coat of primer.
-While you have your primer out, you might as well prime the legs if you are adding them. And prime the plywood.
-Once your primer is dry, apply paint of you choice. I used Olympic Polka Pink. It's a BEAUTIFUL pink and I am in love with it. As I recommended earlier, I would go with a satin finish.
-At this point I then spray painted the primed legs and plywood gold. Metallic spray paint is hands down my favorite spray paint to use. It dries fast and looks amazing.
-Once everything is dry, turn the shelf upside down and add the legs. You simply drill the plates onto the corners, then add the legs to the plates. (I'm not gonna lie, Patrick helped me with this,ha! So if you aren't handy with a drill, or just aren't comfortable because you are scared of messing up…which you very well could at this step, get a girlfriend,boyfriend,dad,mom…basically anyone besides you that is confident with a drill)


-Next the plywood was mounted to the back of the shelf drilling at each corner and in the middle.

-If you have this exact size shelf you can go to Lowes or Home Depot and have them cut a piece of plywood. I had them cut it 30x58 and it's perfect ;)

-All of that and you have yourself a new, fancy piece of furniture.


If you have an questions, feel free to ask! I try and make my posts as understandable as possible, but I also kind of write them the exact way I speak…so I am not sure how clear that is for ya'll!
I am also going to blog the wood grain wall very soon and next week blog the girls rooms for nursery/little girl room ideas ;)


Monday, January 20, 2014

Instagram Canvas


 So, over a year ago I ordered one of those large poster collages from Printstagram. When in came in the mail Patrick and I were all like "ohhh this is awesome!!","whoa", "I love this". It was pretty cool.

 Then it wasn't. We could not find a frame for this thing anywhere. ANYWHERE. (and I do not pay for custom framing…no way, not this girl) So we rolled it back up, put it aside and kept our eyes open for an appropriate frame. At least a year past. I started getting super irritated…but then one day I realized that if I cut the print in half I would pretty much have two 20x20 prints and that would go perfectly on a 20x20 canvas. I plan on ordering more now that I am aware of this!!!! (don't even get me started on how far behind I am ordering photos…it gives me anxiety thinking about it)

 Anyway, this is so easy I swear Annabella could do it and she is 5. You can do this with any size photo and canvas. I have seen it done on the black canvases too and it looks really cool.

You need:

photos
canvas
modge podge
something heavy

I started by applying modge podge to the entire canvas.
I then placed the photo on top, and rubbing out any air making sire it was even.
Throw some heavy books on top.
When glue is dry (I let them go over night), take said heavy things off.
If any edges look too sharp/don't look good you can use sand paper and file them down.
Apply another coat of modge podge to the top of the photo and sides of the canvas.
When that is dry, hang it!!

Super cute. Super easy. You're welcome :)


Sunday, January 19, 2014

Slightly Over Drawn Natural Lip

 I have had so many people ask on IG what lip color I use, I figured I would make an entry about it. The truth is that being a makeup artist (on hiatus), I have TONS of lipstick, liners and gloss. It's insane. So I wear different colors all of the time. I thought I would share my current go to natural colors and I quick tutorial for everrrr so slightly over drawn lips.
 I have never had a problem with my lips. They aren't the plumpest, but they aren't teeny tiny. Kinda middle road kind of lips. But I do like to over line then a bit!! When I wear a fuchsia or a red, I definitely over draw them more. But again, this is for a natural day look ;) 

To do it my way you need:
-concealer 
-nude lip pencil
-whatever shade lipstick is nude for you
-lipgloss 
-lip brush (optional)

For this particular lip I used:
-Mac studio finish concealer (it's thick)
-Smashbox nude liner in "fair"
-Urban Decay lipstick in "naked"
-Mac lipgloss "please me"


Step 1: cover lips and slightly around lips with concealer. Again, I use the thick concealer, and I occasionally set it with pressed powder. If I am doing a non natural color I ALWAYS set it with powder to prohibit bleeding. 

Step 2: line your lips following the natural curve of your lip. Don't go making up shapes for a natural look! Once my natural line is lined, I go slightly on top of that line and re-line.

Step 3: fill in with lipstick. If you choose use a lip brush, you can perfect them using this OR you can get your pencil back out and using that continue to make the outlines a little bigger with the lipstick and pencil (kind of drag the lipstick a bit with the pencil or lip brush) This is your chance to perfect the lines and make sure your lips aren't all wonky and crazy looking!

Step 4: apply gloss and you're set! 


Saturday, January 18, 2014

Doily Dream Catcher


 I started out wanting to make an "authentic" dream catcher…well, that didn't work! I am soooooo impatient and the stringing part really irked me! I still had all of the supplies I had bought to make it, so I just decided to go with the doily version. Not so sure on how many dreams this doily is going to catch though, haha.

I used:

an 18 inch macrame ring
sueded cord
fishing wire
waxed thread
doily
feathers
wooden beads
turquoise pieces
random decorative ribbon/trim
scissors
glue gun

The dream catcher I made is LARGE. You can obvious choose a smaller size ring. All of the craft stores where I live stopped carrying these rings, well, except for Hobby Lobby, but they were sold out. You can order them here if you cannot find them locally.

I started out by covering the wire with the sueded cord. (I used two packages because the frame is so large) I glued the one end to the wire and just looped it all the way around.

After that I used fishing wire to attach the doily to the metal frame. I looped it at each point of the doily.


I glued the ribbons and trim on. I added beads and feathers to the waxed thread and tied the waxed thread to the wire. I also glued a turquoise piece to the middle.


This craft was super fun to do and I like that I didn't use any tutorial for it. I just looked at pictures I liked for reference and just figured it out, which made it pretty exciting. Although it would have been nice to have a list of things I needed! I made several stops to quite a few craft stores until I figured that part out! So I thought I would share a basic outline if what is needed to do this project! Now that I figured it out I am going to order some fancy vintage doilies and make some more!! Have fun getting' crafty!!


Tuesday, January 14, 2014

Heart Backdrop/Garland


 I am putting this up for Valentine's day decoration, but who am I kidding, I will probably leave it up all year in the girls playroom. We love gold, pink and hearts around here!! This craft was super easy, and cheap…especially if you already have the hearts punches.

You will need:

card stock
heart paper punch(s)
fishing wire
double sided tape
scissors
hooks and small metal circles for hanging (although I just taped mine to the wall for now)


-Using your heart punch, punch your card stock hearts. I used a combination of plain pink, glitter pink, glitter gold, and mirror gold paper. (from Michael's)
I also used a medium and large heart punch to create different size hearts.
Measure how long you want the garland to be
-Cut the fishing wire pieces and tape them to the floor at the top and bottom. Fishing wire is one of my biggest craft enemies and this made it so much easier.
-Once you have your hearts punched, figure out what order you want your colors to be (that is if you are doing multi colored. All of the same color would look awesome too)
-I used two pieces per heart, so using double sided tape I taped one heart to the fishing wire, and then added another on top of that. This way if you hang them, there won't be a "bad" if the garland moves   around.
I changed the order up on each piece, but each piece has between 8 to 12 hearts per garland.

For now I just taped them to the wall. I actually really like the way this looks….however, I can't seem to figure out if Lucy (the cat) loves or hates this garland. It could be either really because she is a cat and doesn't speak human, but she keeps ripping it down. I am leaning towards she hates it. So later this week I am going to hang them from the ceiling. We'll see how that works!!


Friday, January 10, 2014

Mediterranean Coucous


 I make this for the house weekly. It is perfect for me because I am a "picker". I seldom eat full meals, I just constantly eat small amounts of food all day long. I suppose I have always kind of been like this, but since having children, I just don't even have the TIME to sit down and eat meals. I have also meant to blog this for a while, but I don't usually measure ingredients when I make food. (with the exception of baking) So I payed attention to what I was doing the last time I made it so my post wasn't just like "yeah, so then throw a bunch of this in, and then that", haa.

Again, I make this weekly and it lasts about three days or so. I personally just pick at it. But if you want to make it into more of a meal, you can throw it into a pita and smother it with some food lube. When I do this for Patrick, I put Baba ghanouj in the pita and he loves it ;)

You need:

* 2 cups uncooked couscous (you can prepare as per the directions on the back, but I make mine with chicken or vegetable stock..)
* 2 cups chicken or vegetable stock
* small jar of cut sun dried tomatoes
* 1 cut cucumber
* 1 can medium olives
* 1 can garbanzo beans
* 1 container of feta cheese (pretty sure it's a about a cup and a half)
* 1 TBL dill weed
* 3 TBL olive oil
* 1/2 cup scallion

*prepare couscous as directed on the bag
*while waiting for the water to boil cut cucumber, olives and scallions
*when couscous if finished, just add everything together in a  large bowl. Refrigerate for about 5 hours before eating (although I eat some right away!)

Easy vegetarian meal!!

Wednesday, January 8, 2014

DIY No Sew Curtains

 I haven't had curtains in the living room of the house we rent for YEARS. I had been thinking about sewing my own, but I no longer have a sewing machine. (I used to have two fantastic vintage Singer machines, one was pink and cream and the other was turquoise and cream. AND a serger, but I no longer have them :/) Pat bought me a new machine last year for Mother's Day and I took it back that day! Poor Pat! Don't get me wrong I would LOVE to sew again, but I don't have the room in this house and especially last year with a new baby, I didn't have the TIME. So back it went! I definitely need a craft room in our next home!
(Fast Kelly fact: I used to make see through/clear plastic-y and furry dresses for drag queens and sell them on eBay in the early 2000's! Ha! That was interesting) 
 Anyway, I just haven't found curtain panels I like and when I did they were outrageously priced. So I started researching no sew curtains. These are so easy I am not even going to post step by step- that's how easy they are. 

You need:
- fabric
- scissors
- iron 
- Iron on heat bond 
- drapery clips
- curtain rod
- tape measure 

I ordered my fabric from Warhouse Fabrics Inc.
I bought this blue and off white damask print, in medium weight 


I used coupons and got my drapery clips and rods from Hobby Lobby really cheap.   I also bought the adhesive there, Joann's has it to. 


Drapery Clips look like this, in case you have never seen them


I measured my windows width and length before I ordered and then ordered the appropriate amount. I needed 12 yards all together. I put curtains on two skinnier windows and two large windows. With a coupon the total was $60 (it made 6 panels). I paid under $100 for everything!

*Once your fabric arrives/is purchased, re measure your windows before you cut. Cut the appropriate amount, but remember to leave a few inches for the "hem". Around an inch would be the perfect hem amount on top and bottom, mine were more like 2 inches each. (because I was too lazy to cut them fabric again, ha!) They still look great!
*I folder the fabric and ironed my hem first, and then inserted the bond into the hem, and ironed again. (Instructions are also on the back of the bond packaging)


I really wish I could have gotten a better picture, but I have learned that taking pictures of curtains is indeed difficult! Especially when it's gloomy a lot. So here is the best I could get today! 


Tuesday, January 7, 2014

Purple Hair Review


The holidays have been so crazy that I never updated since I went purple!! The first time we did the purple at the salon, she used a mixture of different purples she had around the salon and diluted it. We wanted to use the Pravana Pastels, but it turns out that the lavender was back ordered, and upon further research apparently there was something wonky about the color. So it's still not available….which means we improvise.
 As it first started to fade, I LOVED it! There were pieces of purple and then pieces faded to an amazing silver like color.
First week:


Second Week (my favorite):


But after a few more washes it was just uneven. I had heard that Sally's carried a pastel purple, so I went to pick it up. I couldn't order a color, it HAD to be done asap. So I picked up the Ion Color Brilliance in lavender. It is OK. I'm not in love, but it got the job done. I certainly would not recommend it if you are going from blonde/white right to purple, it just doesn't distribute evenly, but it did the job okay for a touch up.


My Review:

Cons.
*smells weird
*bad consistency
*uneven distribution
*not a true pastel, still had to dilute

Pros.
*Easy to find, available at Sally's
*Did an alright job refreshening my color

So that's that. I have some Special Effects laying around from two summers ago when I dipped my ends, my "mermaid hair". Until the Pravana is available I am going to use the Special Effects "Purple Smoke" and dilute it with a toner shampoo/conditioner. I might even use it undiluted underneath and diluted on top for some dimension. We'll see how that goes next week ;)


Saturday, January 4, 2014

DIY Bath Bombs


 Ever since I learned what a LUSH bath bomb was, my life has been forever changed. Well maybe not my whole life, but my bathing experience sure has been. I can't even take a bath without one now. (My favorite is "sex bomb"). Being me and wanting to try and recreate anything I can buy myself, I had to try this. It was surprisingly SO EASY. I made six bath bombs during Priscilla's nap, and I could have made more if I hadn't run out of ingredients.

You will need:
- 1 cup of bakin soda
- 1/2 cup of citric acid
- 1/2 cup of corn starch 
- 1/2 cup of fine grain Epsom salt
- 1 tsp water (read directions) 
- 2 tsp essential oil of your choice
- 2 1/2 tsp almond oil 
- wax paper 
- molds (bought them here)
- towel 
- whisk
- mixing bowls
- food coloring (optional) 
- surprises for inside the bombs (optional)

(I bought almost all of my ingredients from Amazon.com)

-Start my placing a towel (I used a large hand towel) on your table and then put wax paper on top. 
-Take all dry ingredients and whisk together 
-Mix wet ingredients in separate bowl. I would recommend  mixing the water and coloring together first and then adding the oils, because my first try I just mixed them all and the food coloring clumped with the oil. 
-Once all of the wet ingredients are mixed, add to the dry. This is when it gets tricky. You WILL need more water. But not too much. Start with a tsp and then just keep adding tsp by tsp. Adding too much will cause a volcano effect and will look like this 

You absolutely do NOT want this to happen. This is very wrong! Haa! I would say to stop this reaction you could add more dry ingredients, but i just tossed mine and started again. 
 The trickiest part is getting the right texture, and this took me a few times because it seemed too dry so I kept adding water. You have to know when to stop! The best way I can describe what the texture should be is wet sand. But not TOO WET sand! 

This is how my good batches looked before I added them to the molds. 

-I added some heart confetti and glitter to my second batch to make them more adorable. (You can also add more before you close the two molds together) 


-Fill the first half of the mold, pack it in. When you get to the other half of the mold, over pack it a bit so when you close them together some of the "batter" comes out. My best outcomes were when I made sure to do this part.
-Close the two molds together. I let mine sit for about 15 minutes and then carefully removed the molds, then set on wax paper over night. 

The instructions above will make you two normal sizes bath bombs. You can use smaller molds and make more, I saw a bunch of plastic molds on Amazon actually.
I used a cucumber essential oil for one of my batches and a vanilla for the others. I also added sea salt to the tops of the molds for the blue ones.
 I am desperately trying to recreate the "sex bomb" LUSH scent, when I figure it out, I'll let you know ;)


Now I am off to give my minis a bath with one of these!!