navbar

Image Map
Showing posts with label beauty. Show all posts

Thursday, March 13, 2014

The Perfect Pastel Purple

 I found it! Every since I went purple a few months ago I have been searching for the perfect combination. Although it may have looked good so far, I had to go really dark purple a few times and have it fade to the color I wanted or use colors that were supposed to be pastel purple and just weren't "right". I also found that mixing with regular conditioner made it really splotchy. Someone anonymously posted the formula for the pastel Pravana (since it has been unavailable for some time) and I have to thank whoever you are because it is PERFECT!!! PERFECT!

I used:
~1 tube of Pravana Clear
~1/2 tube of Pravana Pink
~1 drop of Pravana Violet


Andddd, it's perfect!! Thanks again to whoever posted that on here, you're seriously the best!!

(this is after one wash!!!)

Thursday, February 20, 2014

Jhirmack Silver Shampoo

While I am always on the hunt for good beauty products, they often tend to be more on the expensive side so I thought I would review a very very cheap product!
 So there I was browsing the isles of CVS sans children one morning. Have I mentioned how much I LOVE browsing pharmacy isles alone?? I don't know exactly what it is, but I LOVE aimlessly wandering around CVS. I get lost in there, I pick random as seen on TV products up and read the descriptions convincing myself that #1: what ever it is is the BEST idea ever and #2. That I probably NEED it. I spend about fifteen minutes at each cosmetic brands section looking to see if there is anything new. The irony is that I never even buy pharmacy makeup, but I always look.
 So while I was on this journey through CVS I decided to spend about thirty minutes in the shampoo isle, and there was this beaut!


This song instantly played in my head the second I picked the bottle up. (and who am I kidding, it played in there for the rest of the day!)


 (this is totally showing my age, ha!)

Anyway, I used it and I actually really liked it! The smell wasn't to die for or anything but it did what it's supposed to!! When my hair is at this very light purple/silver stage the silver starts to look a little yellow. It definitely took the yellow out! So for all of you purple or silver ladies, even pastel blonds, it's worth a shot for $3.99!!!

I am soooo glad my hair is back to being a silver purple!! Even if it will only last another week or so before I have to redo it!! (sad face)


Sunday, January 26, 2014

Bumble and Bumble Dryspun Finish


 I love this so much I had to blog it. I have tonsssss of hair products that I never use. The only products I religiously use on my hair are hair spray and dry shampoo. Every once in a while I will throw in one of the unnecessary products just because I have them. (And there are some i really like, but for everyday I just don't always have time for that). Last time I was at the salon getting my hair done by my hair goddess/wizard Nina Childers, (owner of Bella Salon and Spa in Chester Springs,Pa), she said I HAD to try this. My hair is certainly on the fine side. I just happen to have a lot of it (thank god it's growing back after I lost my entire front hair line post Priscilla).
 So I used this after I styled and hair sprayed my hair and WOW- it really really does give your hair a soft "bounce" and good texture. Definitely giving this one a thumbs up. 


Sunday, January 19, 2014

Slightly Over Drawn Natural Lip

 I have had so many people ask on IG what lip color I use, I figured I would make an entry about it. The truth is that being a makeup artist (on hiatus), I have TONS of lipstick, liners and gloss. It's insane. So I wear different colors all of the time. I thought I would share my current go to natural colors and I quick tutorial for everrrr so slightly over drawn lips.
 I have never had a problem with my lips. They aren't the plumpest, but they aren't teeny tiny. Kinda middle road kind of lips. But I do like to over line then a bit!! When I wear a fuchsia or a red, I definitely over draw them more. But again, this is for a natural day look ;) 

To do it my way you need:
-concealer 
-nude lip pencil
-whatever shade lipstick is nude for you
-lipgloss 
-lip brush (optional)

For this particular lip I used:
-Mac studio finish concealer (it's thick)
-Smashbox nude liner in "fair"
-Urban Decay lipstick in "naked"
-Mac lipgloss "please me"


Step 1: cover lips and slightly around lips with concealer. Again, I use the thick concealer, and I occasionally set it with pressed powder. If I am doing a non natural color I ALWAYS set it with powder to prohibit bleeding. 

Step 2: line your lips following the natural curve of your lip. Don't go making up shapes for a natural look! Once my natural line is lined, I go slightly on top of that line and re-line.

Step 3: fill in with lipstick. If you choose use a lip brush, you can perfect them using this OR you can get your pencil back out and using that continue to make the outlines a little bigger with the lipstick and pencil (kind of drag the lipstick a bit with the pencil or lip brush) This is your chance to perfect the lines and make sure your lips aren't all wonky and crazy looking!

Step 4: apply gloss and you're set! 


Tuesday, January 7, 2014

Purple Hair Review


The holidays have been so crazy that I never updated since I went purple!! The first time we did the purple at the salon, she used a mixture of different purples she had around the salon and diluted it. We wanted to use the Pravana Pastels, but it turns out that the lavender was back ordered, and upon further research apparently there was something wonky about the color. So it's still not available….which means we improvise.
 As it first started to fade, I LOVED it! There were pieces of purple and then pieces faded to an amazing silver like color.
First week:


Second Week (my favorite):


But after a few more washes it was just uneven. I had heard that Sally's carried a pastel purple, so I went to pick it up. I couldn't order a color, it HAD to be done asap. So I picked up the Ion Color Brilliance in lavender. It is OK. I'm not in love, but it got the job done. I certainly would not recommend it if you are going from blonde/white right to purple, it just doesn't distribute evenly, but it did the job okay for a touch up.


My Review:

Cons.
*smells weird
*bad consistency
*uneven distribution
*not a true pastel, still had to dilute

Pros.
*Easy to find, available at Sally's
*Did an alright job refreshening my color

So that's that. I have some Special Effects laying around from two summers ago when I dipped my ends, my "mermaid hair". Until the Pravana is available I am going to use the Special Effects "Purple Smoke" and dilute it with a toner shampoo/conditioner. I might even use it undiluted underneath and diluted on top for some dimension. We'll see how that goes next week ;)


Saturday, January 4, 2014

DIY Bath Bombs


 Ever since I learned what a LUSH bath bomb was, my life has been forever changed. Well maybe not my whole life, but my bathing experience sure has been. I can't even take a bath without one now. (My favorite is "sex bomb"). Being me and wanting to try and recreate anything I can buy myself, I had to try this. It was surprisingly SO EASY. I made six bath bombs during Priscilla's nap, and I could have made more if I hadn't run out of ingredients.

You will need:
- 1 cup of bakin soda
- 1/2 cup of citric acid
- 1/2 cup of corn starch 
- 1/2 cup of fine grain Epsom salt
- 1 tsp water (read directions) 
- 2 tsp essential oil of your choice
- 2 1/2 tsp almond oil 
- wax paper 
- molds (bought them here)
- towel 
- whisk
- mixing bowls
- food coloring (optional) 
- surprises for inside the bombs (optional)

(I bought almost all of my ingredients from Amazon.com)

-Start my placing a towel (I used a large hand towel) on your table and then put wax paper on top. 
-Take all dry ingredients and whisk together 
-Mix wet ingredients in separate bowl. I would recommend  mixing the water and coloring together first and then adding the oils, because my first try I just mixed them all and the food coloring clumped with the oil. 
-Once all of the wet ingredients are mixed, add to the dry. This is when it gets tricky. You WILL need more water. But not too much. Start with a tsp and then just keep adding tsp by tsp. Adding too much will cause a volcano effect and will look like this 

You absolutely do NOT want this to happen. This is very wrong! Haa! I would say to stop this reaction you could add more dry ingredients, but i just tossed mine and started again. 
 The trickiest part is getting the right texture, and this took me a few times because it seemed too dry so I kept adding water. You have to know when to stop! The best way I can describe what the texture should be is wet sand. But not TOO WET sand! 

This is how my good batches looked before I added them to the molds. 

-I added some heart confetti and glitter to my second batch to make them more adorable. (You can also add more before you close the two molds together) 


-Fill the first half of the mold, pack it in. When you get to the other half of the mold, over pack it a bit so when you close them together some of the "batter" comes out. My best outcomes were when I made sure to do this part.
-Close the two molds together. I let mine sit for about 15 minutes and then carefully removed the molds, then set on wax paper over night. 

The instructions above will make you two normal sizes bath bombs. You can use smaller molds and make more, I saw a bunch of plastic molds on Amazon actually.
I used a cucumber essential oil for one of my batches and a vanilla for the others. I also added sea salt to the tops of the molds for the blue ones.
 I am desperately trying to recreate the "sex bomb" LUSH scent, when I figure it out, I'll let you know ;)


Now I am off to give my minis a bath with one of these!!


Friday, January 3, 2014

Beauty Favorites


 I thought I would kick off the new year with a favorite product post ;) I am a self proclaimed product junkie so I am just picking a few of my absolute favorites! (Well maybe more than a FEW, ha!!)


(Mascara and liner in black. And NARS blush is Orgasm)

As far as the dry shampoo goes, I have tried IT ALL. I have tried just about every brand that makes it from cheap to expensive and for the price of Not Your Mothers, you really can't go wrong. I am so ecstatic about dry shampoo... It is quite possibly a problem. 

What's your favorite concealer? I think it's time for me to try something new (meaning not mac!)


Thursday, December 12, 2013

DIY Creamy Coconut Oil Scrub


 These have become my favorite. Not that the previously blogged aren't awesome, because they are, they are just totally different types of scrubs. The earlier posted scrubs are definitely rougher, super super duper exfoliating and not for your face. These coconut oil scrubs still exfoliate but in a more gentle way. The coconut oil moisturizeres your skin unlike anything I have used before. When I used the vanilla one last night in the shower I could not BELIEVE how soft my skin was. I didn't even apply a moisturizer after words. I used it all over, even my face and it was just magical.

To do these you need:
-coconut oil 
-pure cane sugar 
-vitamin E drops 
-touch of almond oil
-fragrance
-food coloring (optional) 

Creamy Vanilla Scrub
- I used about a half of a cup of coconut oil. It is very cold here, even indoors, so I heated mine in the microwave for about 40 seconds to make it soft.
- Add coconut oil and about a cup of sugar. I used a mix of raw organic pure cane and turbinado sugar. I did this because I like the different textures. You could use either alone, or mix as well.
- I then added a few squirts of almond oil,  a few drops of vitamin e and a few drops of vanilla essential oil.
- Mix well and add to your container!!

To make the grapefruit I did the same steps as above but added some peach and pink food coloring and swapped the vanilla for grapefruit oil. It is not an in your face scent mixed with the coconut oil, it's softer. 

I am definitely gifting these! I would enjoy receiving these myself! To make the lid, I took a piece of scrapbook paper, traced the inner lid onto it, then cut it out. The labels are chalk board stickies from hobby lobby. I really wish my handwriting was better :/ but whatever, ha. 


Note: after the coconut oil sits, if you live in a cooler climate, it will get harder again. It warms easily, just scoop desired amount you want to use in the shower and once you start applying it will become creamy again instantly. They are homemade, and made from organic ingredients. I am really in love with these!!


(And yes I used the vanilla already! Sorry!)

DIY Sugar Scrubs


 I never thought I would see the day where I made my own body products, not gonna lie! Ha! Who am I!?
 I decided to make these because it is just too easy, and I like knowing what is in the products that I use. They also make a great, easy present and Christmas is right around the corner!! I made two different ones today. I made a pink sweet pea scrub for Annabella and a vanilla scrub for myself. These are definitely BODY scrubs. They are rough, great for dry spots, but I would say too rough for facial use. 

You need:
- pure raw cane sugar
- brown sugar
- almond oil (or coconut) 
- fragrance/ essential oils 
- vitamin E drops 
- mason jars or container of your choice

Brown Sugar Vanilla Scrub
To make one container I used:
-about 3/4 cup raw sugar
-about 3/4 cup brown sugar
-about 3/4 cup almond oil
-a few drops of vitamin e
-a few drops of vanilla essential oil

-First I mixed the sugars in a bowl. 
-I then added the almond oil and stirred well, getting any clumps out. 
-Next I added the vitamin e 
-Then the vanilla. 
-Mix well and add to your container of choice.

My measurements are approximate because it depends on your container. I first started using 1/2 cups of the sugars but when I went to add it to the jar, it wasn't enough. So you really have to eye it up based on the size of the container. If you don't have enough to fill,  just add a little more of each ingredient until it's perfect. It is really hard to mess up, trust me! 

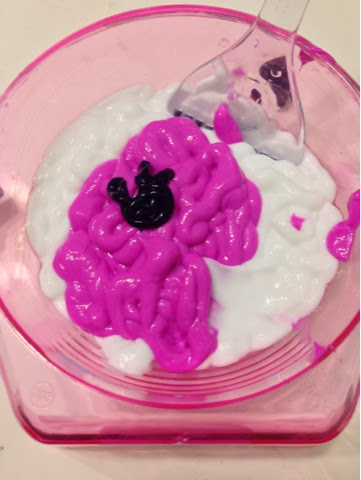
For the sweet pea, it's basically the same directions except I only used pure cane sugar, so double that. I also added a pink food coloring to make it pretty. And swap vanilla for the sweat pea. The scent is actually from Hobby Lobby in the soap making area. It smells good! A little strong, but I think I used too much, so add in small amounts!! I think for my next pink scrub I am going to use a rose essential oil. But AnnaBella loves it and that's all that matters, right?? 

I will definitely be making a ton of these this week to add to people's Christmas presents! I can't wait to go and get some new essential oils to try!!


Saturday, November 23, 2013

Lilac hair

 So I have hair problems. At some point in my 20's I became severely allergic to hair color. Well, an ingridient in hair color called PPD. Every semi or permanent color has it and the trickiest thing is even "all natural" colors and colors that claim "NO ppd" actually have a chemical called toluene 2.5 diamine sulphate which is pretty much the same thing, and most people that are allergic to PPD are also allergic to that.  So this leaves me able to use bleach- but no toner. So my hair goddess (Nina Childers the owner of Bella Salon in Chester Springs,Pa) gets my hair justttttt right without a toner. I can also do "fun" colors. Special effects, pravana, manic panic, etc. 

But here is the problem: I am DYING to go back to my natural color or a shade or two darker.. Not only have I not been this color in forever but it makes doing fun colors easier because then I can just throw a brown over top when I am finished with the wild color instead of bleaching it out. That is one of the main reasons I haven't done a fun color in a few years (well an all over fun color) bc the thought of ruining my long hair gives me anxiety. Ugh. Girl problems. 
 But then I thought, hey, I can do a lilac and that would probably fade out really well on bleached hair...


I think this could work. I would of course LOVE to go bright red again, but my husband isn't feeling that. (Even though that was the color it was WHEN WE MET! HOW RUDE!!)
So I think I am going to do it. I haven't had a really wild color in a few years, and it seems to be very socially acceptable these days, haa. I am an OG color gal. People looked at you like they had never seen a human with pink hair before back then!? 
 Bottom line- I have hair ADD and have had the same hair color for far far too long!!