navbar

Image Map
Showing posts with label diy. Show all posts

Tuesday, April 1, 2014

Ikea Chalkboard Table Hack!


 I can't believe I actually have time to blog this!! I completed this hack about a month ago, and am just getting around to this now!! Things are a little crazy over here!
 I have seen this hack around before, so I am definitely a little late in the game on this one, BUT it was my first time doing this hack, so I thought I would share!!

The best thing about this is that the table costs $19.99. Between that and the paints you need, you are looking at about $35.00 total for a really cute customized kids table!

First, start by ordering the table here. Or just go to the store if you are lucky enough to have one close by.
Once the package arrives take out all of the pieces and paint them!!

I found that I needed 2 coats of spray paint and about 3 coats of the chalkboard paint!

Assemble!
I bought 2 white hooks from Lowe's and attached them to the side.
The pails are from the dollar bin at Target!
That's it!!


Funny thing is that the first set they sent me was missing a piece so not only did they send me the piece but a whole new one?! What?! So now I am going to make a second one!! I think I am going to do it gold and pink (big shocker I know!)

Thursday, March 6, 2014

Spray Painted Crib/Priscilla's Room


We had not planned on getting Priscilla a toddler bed at all. Actually, we are moving in a few months and the plan was to keep her in her crib until we move and then as per Annabella's request, get bunk beds for the girls…..well, we have a crib hopper. I watched her do it once and that was enough to get her into a toddler bed! It looked VERY dangerous!
 So here I am searching the internet for toddler beds when I remembered that the front of her crib comes off to turn it into a toddler bed! (duh!) Wanting to make it a little more special, I decided to spray paint it.
 I used Rust Oleum Painter's Touch in "Candy Pink"…I mean…there is even a crib on it, ha.


Now, I don't know how safe this paint is for a crib if you have a crib biter. Annabella was definitely a crib biter, but Priscilla isn't so I feel safer using this. You could always use a crib guard to prevent them from chewing.


I also searched everywhere for decent toddler bedding. I ended up going with The Dream Girl set from The Land of Nod. I LOVE this bedding!

Here are some more pictures of her pretty pretty room while we are on the topic:


This was the way her dresser and frame wall were in the beginning. Then we had to rearrange 


Sunday, February 16, 2014

Fabric Tassels


 I have wanted to do fabric tassels for some time now. I have done paper tassels but I like the longevity aspect of the fabric ones. While staring at the gold faux wood grain wall in the playroom, I decided that fabric tassels would be the finishing touch. They are super easy and I finished them in two days during Priscilla's nap.

You will need:
Scissors
Fabric
Twine (rope or string)


That's all! If you wanted to get super fancy you could use a cutting mat and a rotary cutter, I didn't. Although, that does remind me that I DO need a rotary cutter asap!

I bought a yard of four different fabrics. You definitely want to get fabric that is the same on both sides, or at least not too different. The one fabric I bought was not, and those do not look as good as the rest of them. Lightweight to medium weight work the best for this one.

-Start off by cutting the fabric 18x24 (I got about three tassels per yard, but I am super wasteful and sloppy. You could probably get 4, haa!)
-Once the fabric pieces are cut, fold the fabric in half.
-Start cutting the fringe. Cut almost to the top, leave 1 to 2 inches uncut.
-Once you are finished cutting the fringe, open the fabric up and untangle any tangled fringe.
-Start rolling the fabric.
-Once it is rolled, fold in half.
-Once it is folded in half tie fabric around the loop. I used scrapes of fabric, and I'm not going to lie, for about two I just cut a fringe off of the tassel and used it.

-Do this about 10 times! I found it to be quite tedious. so I split it up over two days during Priscilla's nap.


Tuesday, February 11, 2014

Mustache You To Be Mine


 Back to me procrastinating on Valentine's Day….last Vday, we started our Valentine's almost three weeks early. Mostly because of Annabella's attention span, we would do a couple a day but also because I like to get stuff done! This year just rushed over here! So here is a last minute homemade card idea for any of you procrastinating, busy moms.
 I had to do over 20, and it didn't take a lot of time at all!

You need:
Cards/envelopes
Card Stock
Mustache punch/or stencil
Popsicle sticks
Glue gun
Paint pen/sharpies/stamps/sticker letters
Razor blade

I bought some of the cards at Michael's and some in the dollar section at Target. When I first started this I was going to use a stencil. You can just google stencil and go from there. Then I saw a mustache punch in the scrapbooking isle at Target and snatched that bad boy up! (it saved me soooooo much time!) I used glitter card stock. It's my favorite. It's thick and who doesn't love glitter! I bought turquoise,purple,black,red and pink so they could be for girls or boys. I had planned on stamping the "you a ?" part, but the cards were too glossy and the ink wouldn't dry right, so I just used a sharpie and wrote it on. The inside I used a "be mine" stamp from Michael's. You could hand write any of this, use stamps, or foam letters.

-I started by opening the card and slicing two small slits into the front of the cards.

-I then punched all of the mustache's out.
-Put a dot of hot glue at the top of the popsicle stick and attached the mustache's.
-When that is dry, insert the popsicle sticks into the slits.
-At this point you can really do what you want. Again, I did the "be mine"stamp inside and added some stickers, then had Annabella sign her name at the bottom of them!!
-Put cards inside of the envelopes and then let your little one draw pictures on the envelopes and add Valentine's Day stickers.


Monday, February 10, 2014

Heart Paint Chip Canvas


 Wow, the past two weeks have been something over here!! I had all sorts of fun Valentine's Day crafts and treats that I wanted to blog well before the week OF Valentine's Day. Between us having a bat in the house for a few days…yeah, a BAT and then me not feeling well for a few days, Valentine's Day crafts had to be put on hold. Now that I am feeling better I am frantically trying to finish all of the things I had planned!
 I ripped this one right off of Pinterest. It is a pretty popular one, so if you have already done this craft, I understand! But it is just too cute! It has been reblogged so many times I cannot seem to find the original poster to link. So, sorry about that!
 It is an incredibly easy AND cheap craft because the paint chips are free. You should have seen me at Home Depot with the biggest stack of paint chips known to man. I actually felt guilty, so I mentioned to an employee that I had a craft to do because I felt like a criminal taking so many! Haha!

You need:
-Lots of paint chips
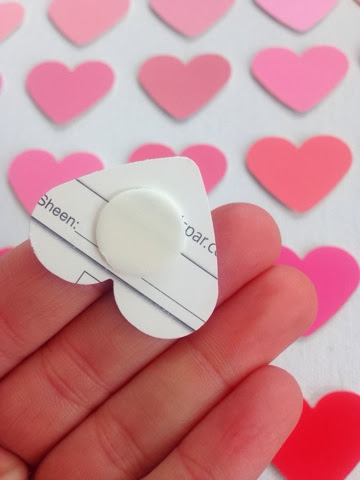
-Foam Mounting Dots (I ised 3 1/2 pkgs)
-Canvas (I used 11x14)
-Heart Punch

-Start by punching the paint chip hearts.
-Arrange the hearts on canvas from light to dark before adding the sticky foam mount. This is where the perfectionist in me had a REAL problem. In my mind it was going to be the most perfect ombre you have ever seen. In reality, I had taken so many paint chips that the tones were not quite the "perfect" ombre but I ended up liking it in the end!
-Once you have the color scheme you like, start adding the foam mounting dots to the back of the hearts and attach.


-That's it!! Quick, easy and cheap crafting right here!


Friday, January 24, 2014

Ikea Expedit Hack


 Wow. Who knew? We have had this old, beat up Expedit thing forever. Actually, we have had a few. I think we gave our other one to our babysitter a few years ago. Even though we are moving in a few months, I haven't stopped refurbishing,decorating,etc. I mean, it's less I have to do when we move right??
 For the past few weeks I have been redoing the "playroom". I say "playroom" because it is really just an oddly shaped room off of our living room that is supposed to be a dining area…because we have outgrown this house, there is no dining in that room! It is just over packed with toys. So here I am trying to make the best of a small, oddly shaped house with too much stuff! Anyway, the Expedit was about to go OUT THE DOOR but I was like, hmm…let's paint it. And we did. And it's AWESOME. I really wish I would have taken a photo of the before! It was so so so sad. It had smashed shelves, falling off shelves, scuffs, it was a hottt mess. We started out by fixing the shelves and then went from there.


You need:

An expedit shelf
Primer
Paint (I recommend satin. I used eggshell, and I have to put a top coat on because it's too flat)
Small legs (wood section of hardware store)
Straight top plate (to connect the legs)
Plywood
Drill


-If it is the dark/brown ikea color you have, you need to prime it and prime it WELL. I would recommend three coats of primer. I did two (because I'm lazy) and I ended up having to use three coats of actual paint on some spots. Which is obviously way more expensive than just sucking it up and doing a third coat of primer.
-While you have your primer out, you might as well prime the legs if you are adding them. And prime the plywood.
-Once your primer is dry, apply paint of you choice. I used Olympic Polka Pink. It's a BEAUTIFUL pink and I am in love with it. As I recommended earlier, I would go with a satin finish.
-At this point I then spray painted the primed legs and plywood gold. Metallic spray paint is hands down my favorite spray paint to use. It dries fast and looks amazing.
-Once everything is dry, turn the shelf upside down and add the legs. You simply drill the plates onto the corners, then add the legs to the plates. (I'm not gonna lie, Patrick helped me with this,ha! So if you aren't handy with a drill, or just aren't comfortable because you are scared of messing up…which you very well could at this step, get a girlfriend,boyfriend,dad,mom…basically anyone besides you that is confident with a drill)


-Next the plywood was mounted to the back of the shelf drilling at each corner and in the middle.

-If you have this exact size shelf you can go to Lowes or Home Depot and have them cut a piece of plywood. I had them cut it 30x58 and it's perfect ;)

-All of that and you have yourself a new, fancy piece of furniture.


If you have an questions, feel free to ask! I try and make my posts as understandable as possible, but I also kind of write them the exact way I speak…so I am not sure how clear that is for ya'll!
I am also going to blog the wood grain wall very soon and next week blog the girls rooms for nursery/little girl room ideas ;)


Monday, January 20, 2014

Instagram Canvas


 So, over a year ago I ordered one of those large poster collages from Printstagram. When in came in the mail Patrick and I were all like "ohhh this is awesome!!","whoa", "I love this". It was pretty cool.

 Then it wasn't. We could not find a frame for this thing anywhere. ANYWHERE. (and I do not pay for custom framing…no way, not this girl) So we rolled it back up, put it aside and kept our eyes open for an appropriate frame. At least a year past. I started getting super irritated…but then one day I realized that if I cut the print in half I would pretty much have two 20x20 prints and that would go perfectly on a 20x20 canvas. I plan on ordering more now that I am aware of this!!!! (don't even get me started on how far behind I am ordering photos…it gives me anxiety thinking about it)

 Anyway, this is so easy I swear Annabella could do it and she is 5. You can do this with any size photo and canvas. I have seen it done on the black canvases too and it looks really cool.

You need:

photos
canvas
modge podge
something heavy

I started by applying modge podge to the entire canvas.
I then placed the photo on top, and rubbing out any air making sire it was even.
Throw some heavy books on top.
When glue is dry (I let them go over night), take said heavy things off.
If any edges look too sharp/don't look good you can use sand paper and file them down.
Apply another coat of modge podge to the top of the photo and sides of the canvas.
When that is dry, hang it!!

Super cute. Super easy. You're welcome :)


Saturday, January 18, 2014

Doily Dream Catcher


 I started out wanting to make an "authentic" dream catcher…well, that didn't work! I am soooooo impatient and the stringing part really irked me! I still had all of the supplies I had bought to make it, so I just decided to go with the doily version. Not so sure on how many dreams this doily is going to catch though, haha.

I used:

an 18 inch macrame ring
sueded cord
fishing wire
waxed thread
doily
feathers
wooden beads
turquoise pieces
random decorative ribbon/trim
scissors
glue gun

The dream catcher I made is LARGE. You can obvious choose a smaller size ring. All of the craft stores where I live stopped carrying these rings, well, except for Hobby Lobby, but they were sold out. You can order them here if you cannot find them locally.

I started out by covering the wire with the sueded cord. (I used two packages because the frame is so large) I glued the one end to the wire and just looped it all the way around.

After that I used fishing wire to attach the doily to the metal frame. I looped it at each point of the doily.


I glued the ribbons and trim on. I added beads and feathers to the waxed thread and tied the waxed thread to the wire. I also glued a turquoise piece to the middle.


This craft was super fun to do and I like that I didn't use any tutorial for it. I just looked at pictures I liked for reference and just figured it out, which made it pretty exciting. Although it would have been nice to have a list of things I needed! I made several stops to quite a few craft stores until I figured that part out! So I thought I would share a basic outline if what is needed to do this project! Now that I figured it out I am going to order some fancy vintage doilies and make some more!! Have fun getting' crafty!!